Quick tip #1 – Wrinkles with VRay displacement
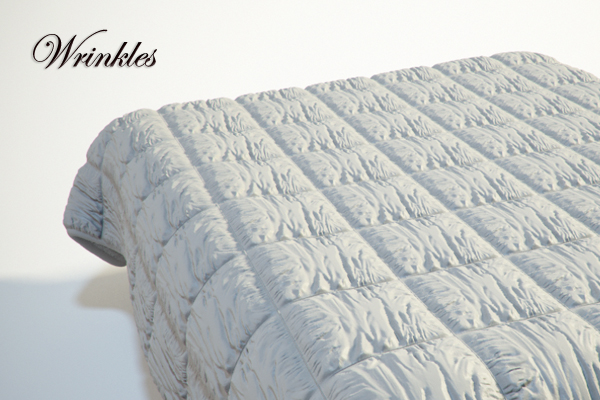
Hi everybody to this first quick tip .. and today’s quick tip is about wrinkles .. wrinkles are one of the most difficult parts when sculpting and it’s even more difficult to export a mesh with like trillion polygons to our scene .. so the solution is always .. displacement .. in our case in this tutorial is the wrinkles in this bed sheet and the way to get this result you see in the images is by using a square pattern of the wrinkles and then tile it around the sheet

You can also tweak the texture in Photoshop to add some randomness by rotating and scaling the pattern (might effect depth in rendering)

This method is the best for this type of wrinkles if you really don’t have the time to model the whole sheet .. also you can apply this technique to any kinds of wrinkles for all types of cloth .. and I guess there isn’t many wrinkles displacement maps out there so you might have to sculpt them manually using z-brush or any other sculpting software and then export the displacement textures
And this is about it and would love to see you your comments if like this tip :)


